This year I was gifted with a 2017 Rickenbacker 330 in JetGlo finish. It is one of the nicest guitars that I have ever owned. While I love tinkering and upgrading my instruments, this guitar really didn’t need anything. So I bought a Mastery Bridge for it… because they make one.

Here is a photo of the original bridge that ships with the guitar from the factory. It’s fine but the bridge pieces have a sharp edge and small notch that the string sits in. I could easily see me bending or using vibrato and pulling a string right out of that notch (which was my justification for modding a really great guitar).

Here is the original bridge next to the mastery for comparison (top view and side view)


While I was working on the guitar I also took a moment and used a Dremel to clean up some rough spots on the cast R tailpiece. There was a spot on the slot for the high E string that was sharp and I had already broken two strings. Since I did this, I have not broken any more strings. I knew there was something amiss as I’m not really one to break strings. Glad it was an easy fix.

The original bridge sits on 4 adjustment screws that fit into a baseplate. The Mastery sits on 4 adjustment screws, but it has tension screws in the side of the baseplate to keep it locked down which keeps it in place when you change strings. This is great but in order to get it put together I had to pull the control panel as those set screws are right up against the body. No way to get an Allen wrench in there with the controls in place. Not a big deal, just mentioning for posterity.

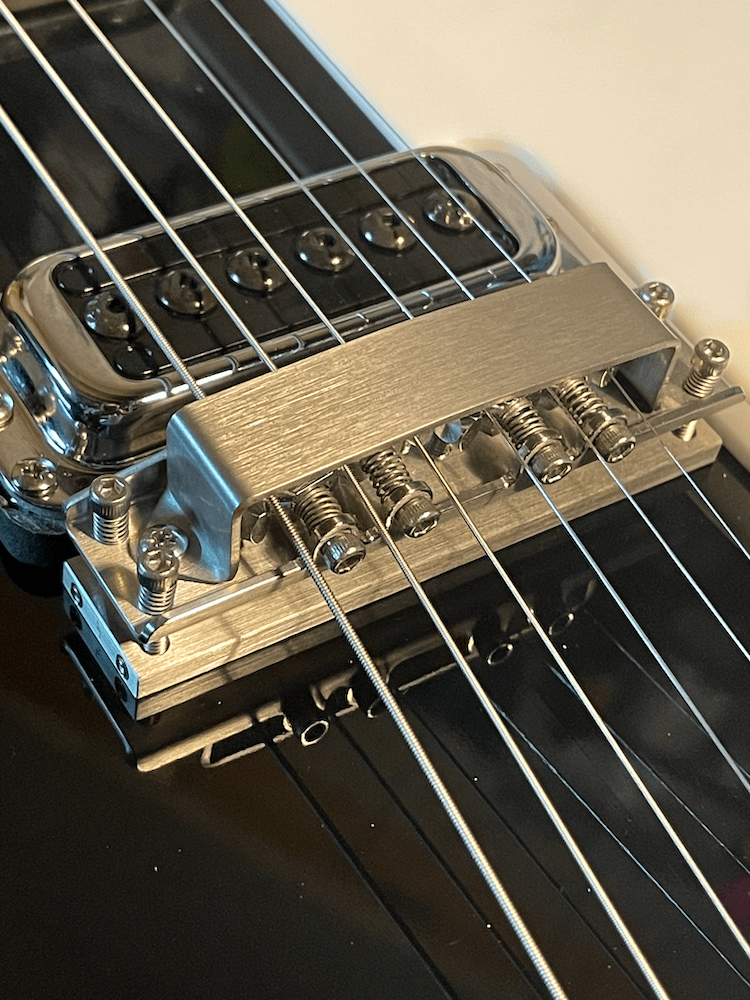
This is with the controls back in place and with strings back on. I had not adjusted the height of the bridge yet but you get the idea of what it looks like with the cover off. The Mastery comes in brushed stainless which doesn’t exactly match the hardware on the 330 but it’s close enough and looks plenty fancy.

Last photo. This was taken once I had done the height adjustments and dialed in the balance on the bridge. It’s important to rock the bridge back and forth until you have it completely balanced. If you have it off center it doesn’t function correctly. Once it’s right, you use an Allen wrench to tighten the lock screws on the side and viola. Last step is to put on the cover which goes on with two small screws. Apparently some players leave this off so they can palm mute. I haven’t had an issue with palm muting. I ride my hand along the front edge of the cover and it works pretty well. This guitar has become a favorite as it plays really well and with the new bridge it responds like my Jazzmaster and my Telecaster, both of which have Mastery Bridges as well. At some point I’ll post about the upgrades on those two guitars. All in all, while the Mastery Bridge is a pricey upgrade, I couldn’t be happier with it and it’s made an amazing guitar into a slightly cooler amazing guitar. Hope you found this helpful and/or informative.